Want to skip the long read? Watch my step-by-step YouTube Video on the entire process.
But even with my strong passion for helping the environment, it can be tempting to just use a plastic bag that I can simply toss away and not have to think twice about once the walk is over. It can feel like a hassle to have to bring home a poo-filled bag, empty it, and then wash it out – so I knew I needed to come up with the easiest and most convenient cleaning method possible that I’d be willing to do on a daily basis.
I looked into what was already out there to spray down reusable baby diapers and what I found was that many parents are using handheld bidets to spray down their diapers over a toilet accompanied by some sort of spray/splatter shield to keep dirty water from getting all over the place.
Although the splatter shields work well for diapers, they don’t work well on bags or anything that is soiled on multiple sides; The issue is that you either have to hold the diaper or have it clipped to the sidewall while spraying, but a dog waste bag needs to be hands-free and sprayed down from all sides.
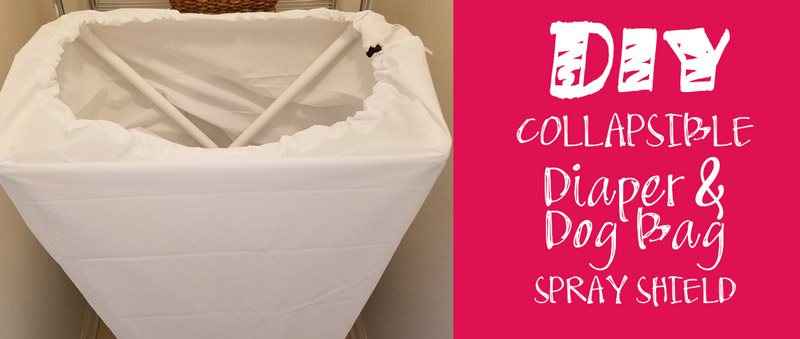
To solve this one-dimensional issue, I decided to design my own splatter shield that could stand up on the toilet on its own and have a pole in the middle that can hold up a bag, freeing up the space around it.
But of course I still wanted to provide a more traditional setup for spraying down cloth diapers for those with both babies and pups in the home.
…and why not have it fold up too for easy storage?
Want to make your own collapsible spray shield? It’s easy!
Tools needed:
|
|
Supplies:
Most supplies can be found at your local hardware store
For Frame:
|
|
For Fabric:
|
For Dog Waste Bag Attachment:
|
|
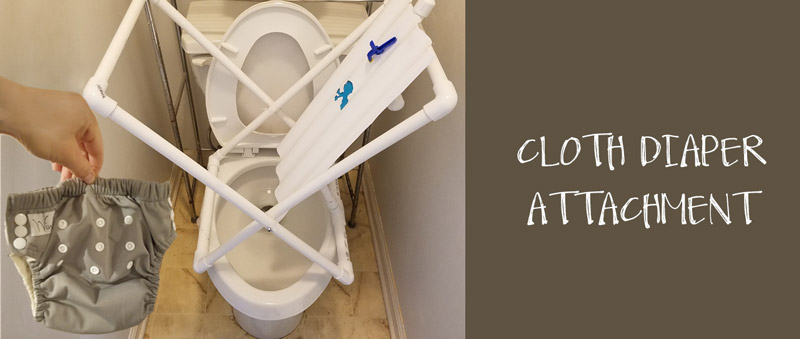
For Cloth Diaper Attachment:
|
|
*TOTAL PVC NEEDED FOR PROJECT: 10 FT of ½” PVC PIPE & 2 FT of ¾” PVC PIPE*
*The smallest roof panel I could find was 2 x 8’ which was way more than I needed. I did end up using the remainder for other projects, but if you don’t want so much leftover, use a similar plastic that is hard and stiff but can still be cut with a scissor.
Making The Frame
First thing you’ll want to do is cut all your pvc for the frame using a hacksaw. I placed a small piece of wood underneath so I didn’t damage my table. It might help to write down each pipe’s length with a sharpie to avoid any confusion later on. Any sharpie marks can be rubbed off later with nail polish remover.
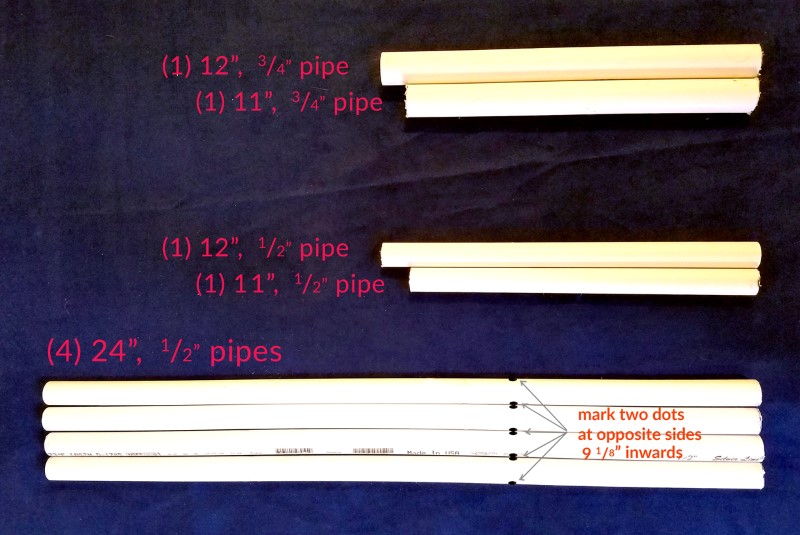
Next take the four 24” long pipes, measure 9 ⅛” up from the bottom and make a dot on the left and right side. For each one, drill through one dot straight across and out the other – it’s very important to not drill at an angle. I used a 9/64” drill bit.
Assemble all the pieces for the frame as follows:
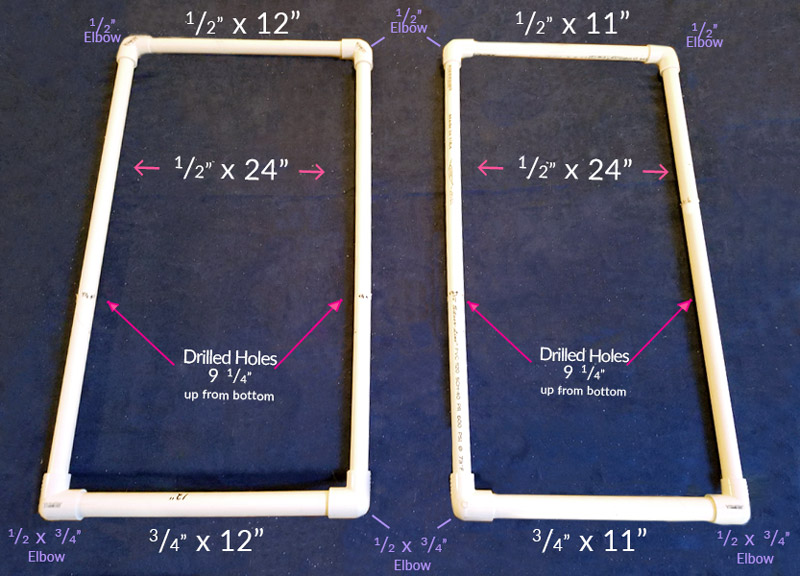
Take the more narrow rectangle (11” wide) and push it diagonally through the other, making sure both of the ¾” pipes are at the bottom half. Twist the 24” long pipes around until all dots are lined up and facing each other.
Fold the two pieces flat and ensure all of the edges are lined up.

While holding the frame steady, push your 2” bolts through the inner hole and out the outer hole on each side; Secure with locknuts.
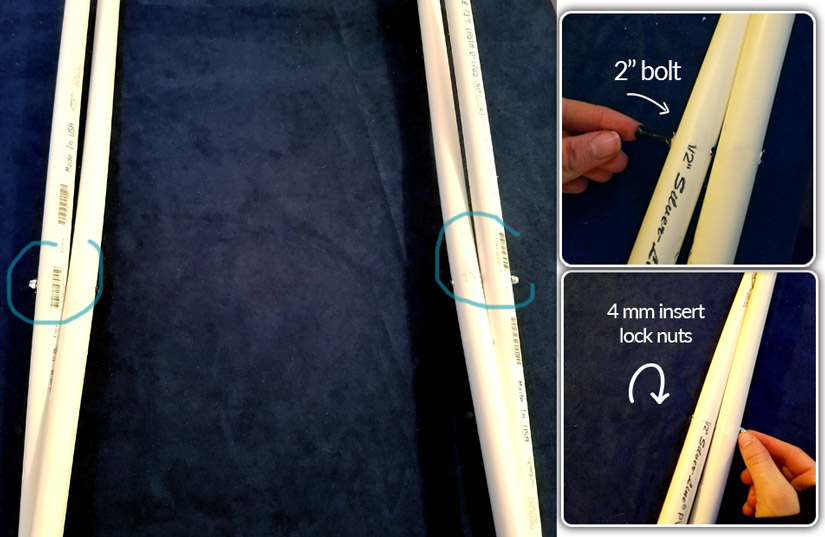
Once the bolts are locked in place, you should now be able unfold your frame. The frame should look and feel symmetrical as it needs to be perfectly balanced to sit on your toilet rim. If it doesn’t quite feel right, either one of the pipe’s lengths may be a little off, or the holes you drilled were not quite at a straight angle.
Once you are happy with your balanced frame, you can cement all the pvc together to keep it in place. Coat each end of the pipe with the primer, followed by the cement and then quickly place each elbow back on. It’s super important to place the elbow back in the same exact direction it was before.

Now we’re left with one problem – the frame has no stopping point and just goes flat when opened. That’s where the fabric comes in!
Making the Curtain
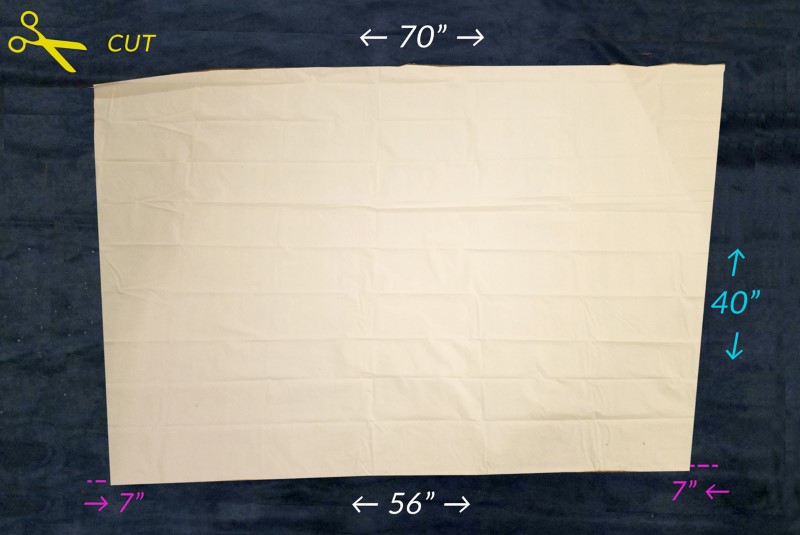
I chose to use a shower curtain because it’s waterproof, mold & mildew resistant, and just happens to be the right size that I need. Whatever kind of curtain or fabric you use, make sure that you are able to run it through your sewing machine.
Cut your shower liner down to 70 x 70”. Then mark one of the longer sides 7” in from both corners. Cut a diagonal line from the 7” marks to the upper corners.
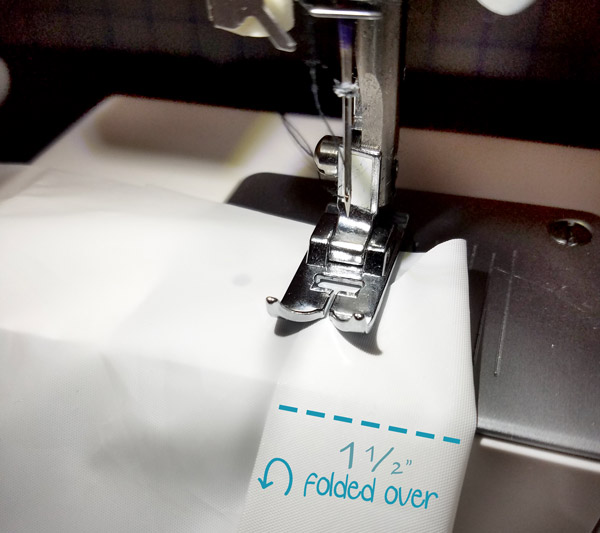
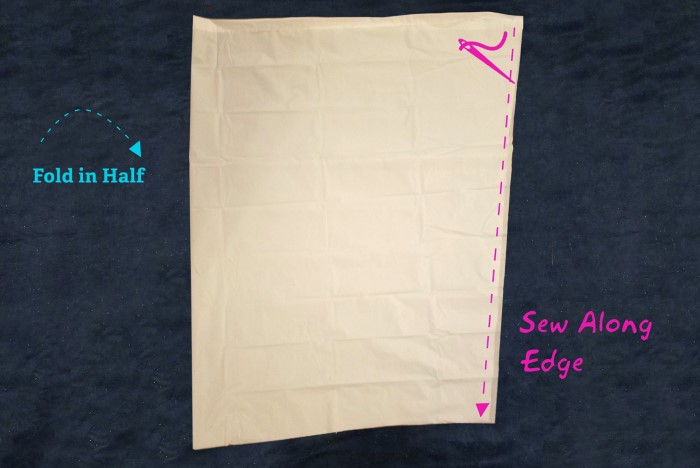
Time to sew! Take the 70” long edge and fold it 1 ½” over. Sew a straight stitch to keep it in place. This casing that you are making is going to house your elastic cord.
Next, fold your curtain in half lengthwise and sew vertically down along the edge, stopping where the casing is.
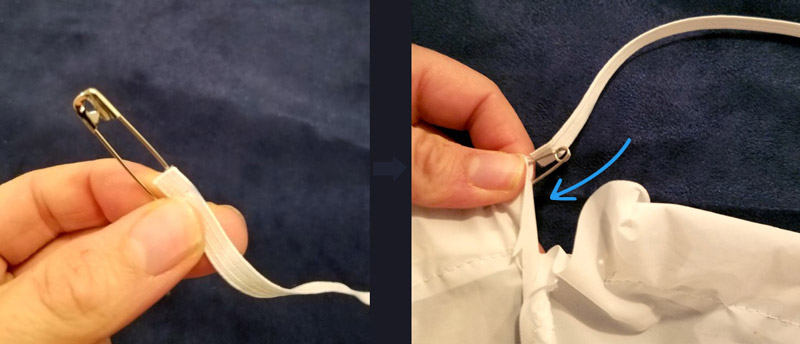
Cut a 55” elastic cord and attach a safety pin to one end. Then run the safety pin through the casing. Nudge it all the way through until it comes out the other end.
Take the safety pin off and run both loose ends through the cord stop. Tie up the loose ends in a triple knot so that its big enough to block the cord stop from slipping off.

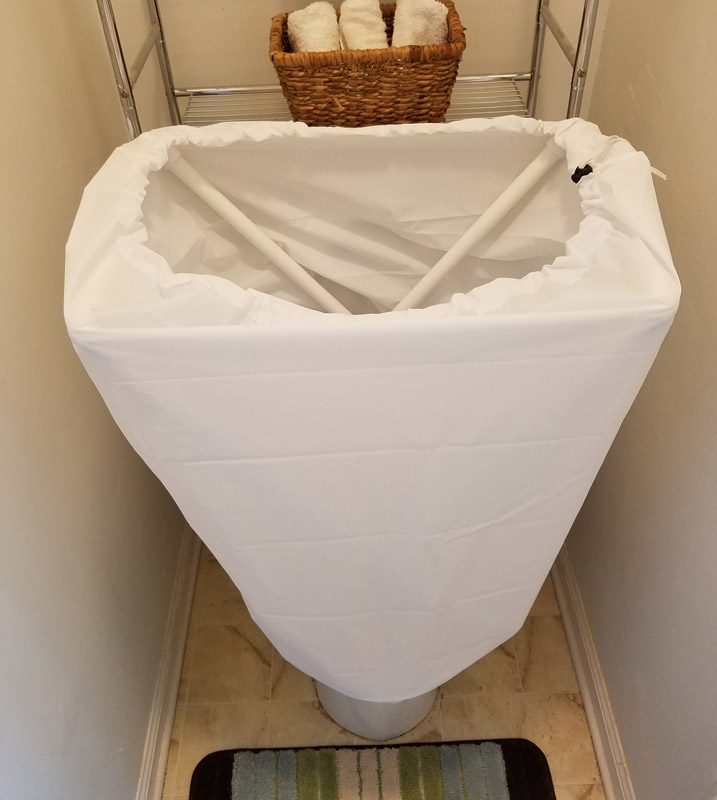
Take your frame and fold it back up. Slip the sewn curtain over it, keeping the elastic end of the fabric on top. Leave about 4” of curtain hanging at the bottom. Adjust the cord stops until the liner tightens around the frame. Note that you can loosen or tighten the elastic cord to adjust the opening of the frame for wider of more narrow toilets.
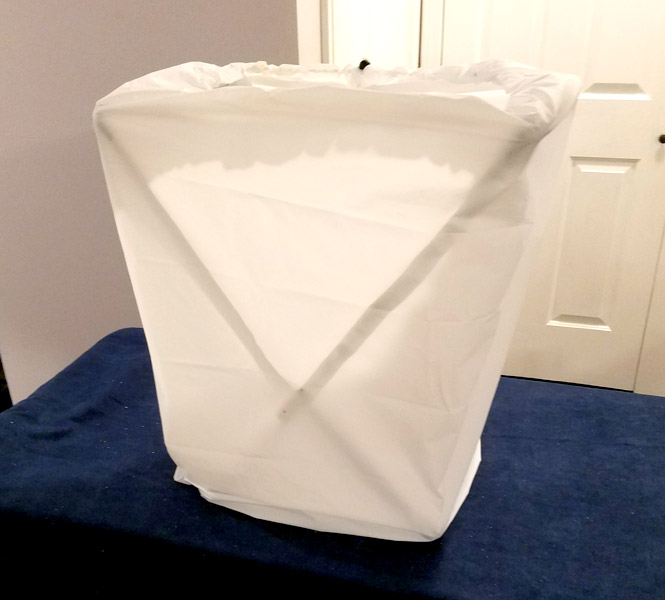
You now have your shield!
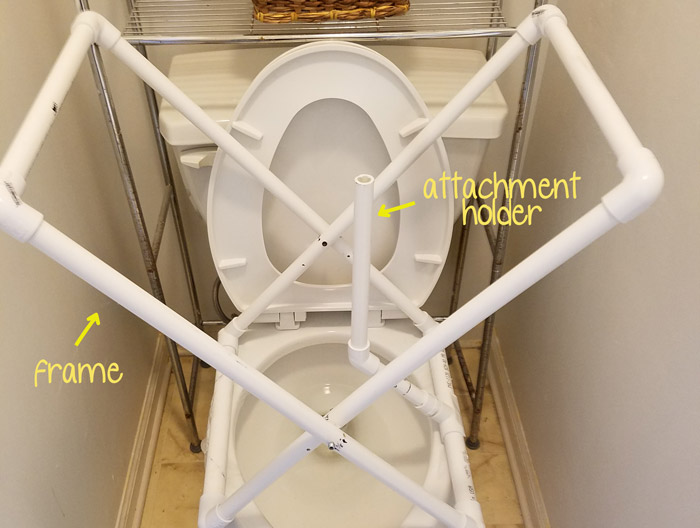
Making the Attachment Holder.
This is the center pole of the frame that will be used to hold both attachments for bags and diapers.
Assemble the pieces as follows:
The tee should have a slit at the bottom. Snap the ½” x ¾” tee onto one of the bottom ¾” pipes of the frame. The pole should rest in the middle of the toilet when the frame is situated on the toilet rim.
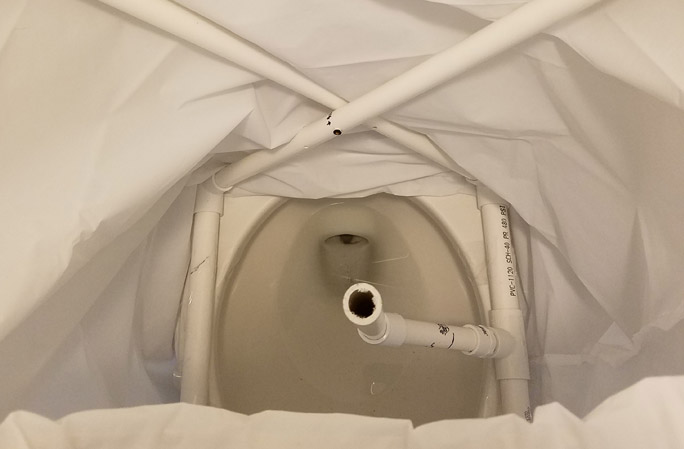
Notice how you can rotate the whole piece back and forth from standing up straight to resting on the side.
Now to make the attachments!
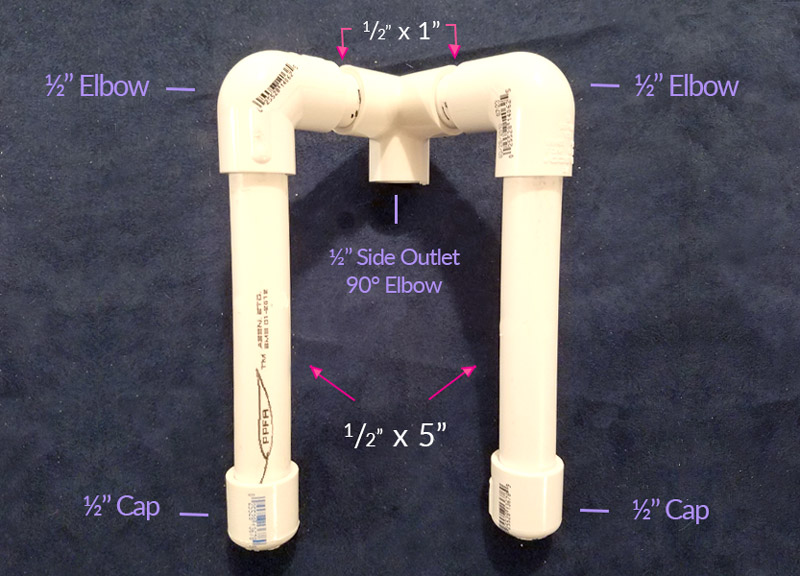
For the reusable dog bag holder:
Assemble, prime, and cement your cut pvc pipes as follows:
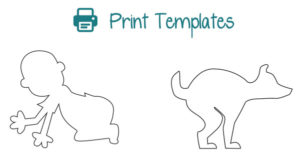
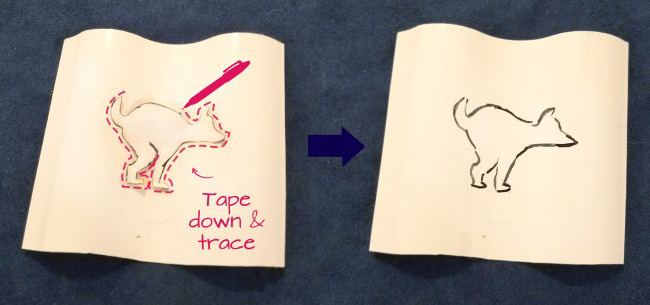
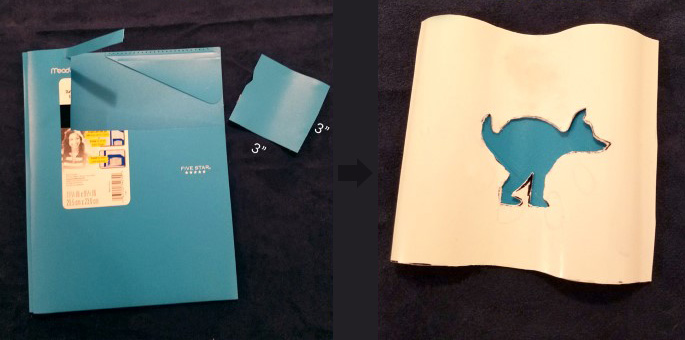
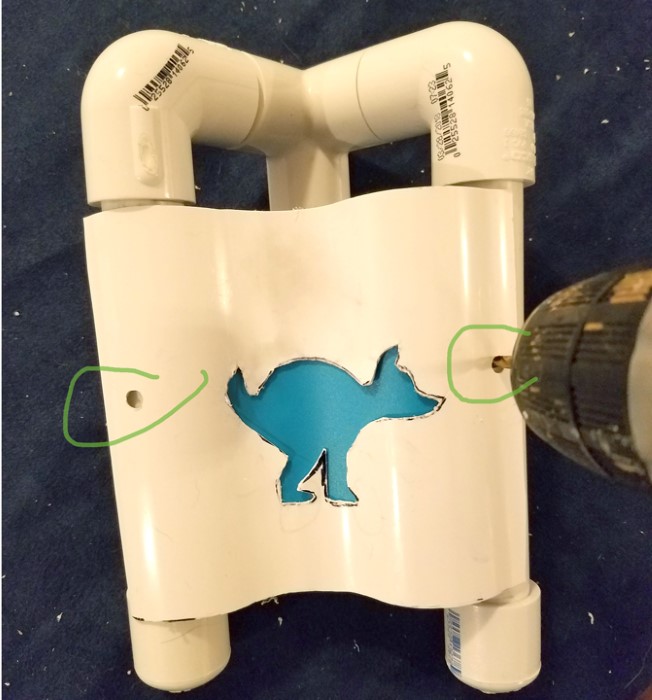
Optional for the dog graphic:Cut out a 4.5” square of the roof panel with a pair of scissors. Print out this image and cut out the dog graphic. Temporarily tape the dog onto the middle of the panel and trace around the edges. Then remove the dog to reveal your outline. It’s a little tricky since the material is stiff, but try using a scissor, blade, or dremel to cut along the outline of the dog. Be careful! Cut a 3 x 3 ” square out of the plastic folder. Hot glue it to the back of your cutout to make a nice blue silhouette. Lay your new panel on top of your assembled pvc. Drill a small hole on the left and right edge going through the panel and into the pvc underneath. Take the panel off and drill additional holes on the inside of the 5” pipes, about ½” away from the first holes you drilled. Take two small zip ties and use them go through the holes in the pipes than to attach to the panel. |


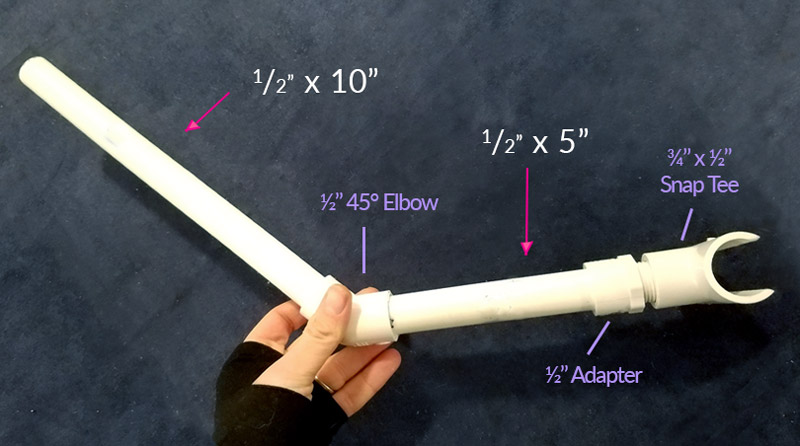
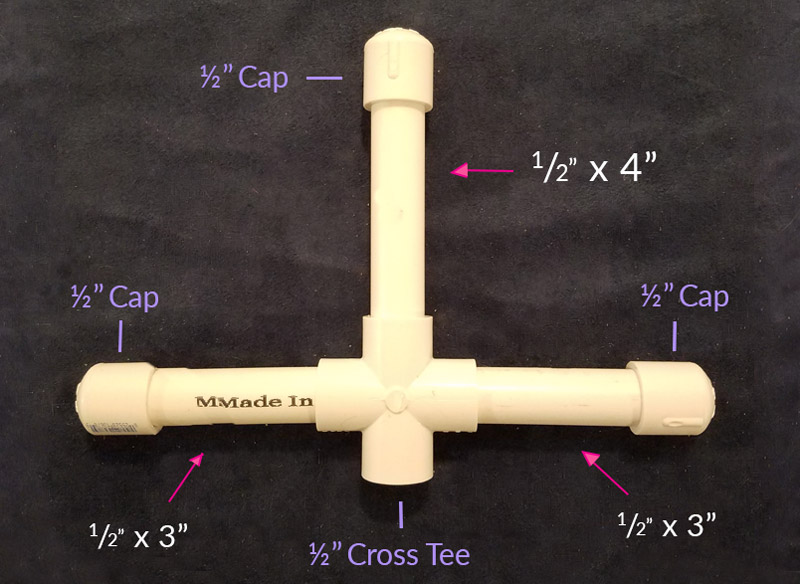
For the cloth diaper holder:
Assemble, prime, and cement your cut pvc pipes as follows:
Cut a 10 x 19 ½” piece out of the polycarbonate roof panel.
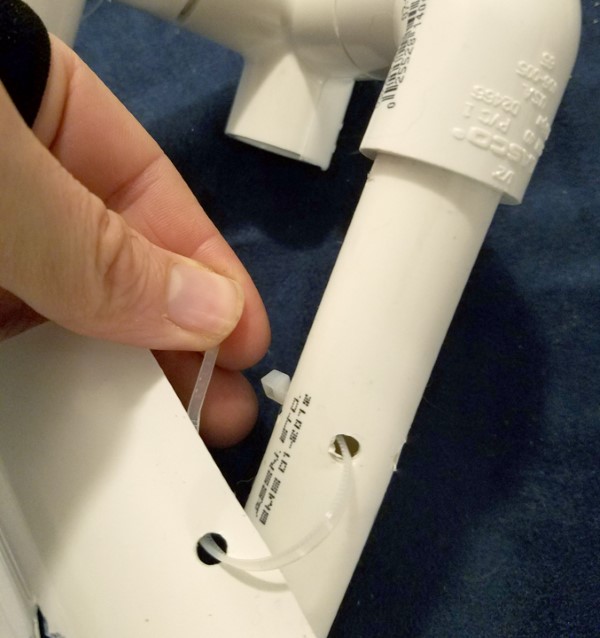
Measure 3.5” vertically down, center-width and drill a 13/32” hole. Push one of the clamps through the hole.

Place your assembled pvc underneath your cut panel, centered horizontally and raised just enough so that the cap on the 4” pipe is showing. There’s a small hole on the clamp’s handle. Drill your small screw through that hole and into the pipe underneath.
The clamp and roof panel should now be attached to the pvc:

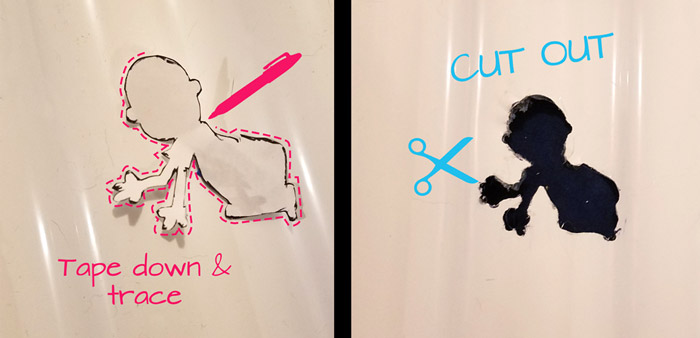
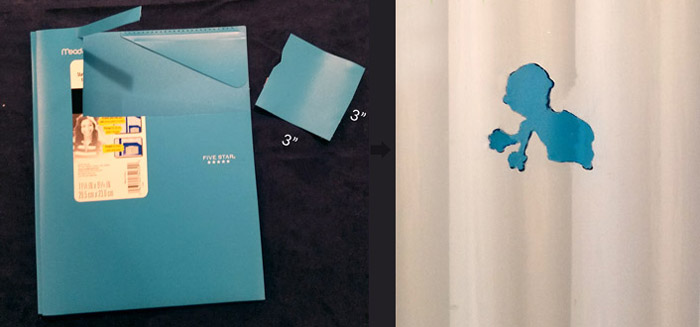
Optional for the baby graphic:Print out the template (if you haven’t already) and cut out the baby graphic. Temporarily tape the baby onto the horizontal center middle of the panel, 8” down and then trace around the edges. Remove the paper to reveal your outline. As best as you can, cut along your tracing with a scissor, blade, or dremel. Be careful!
Cut a 3×3” square out of the plastic folder. Hot glue it to the back of your cutout to make a nice blue silhouette. |
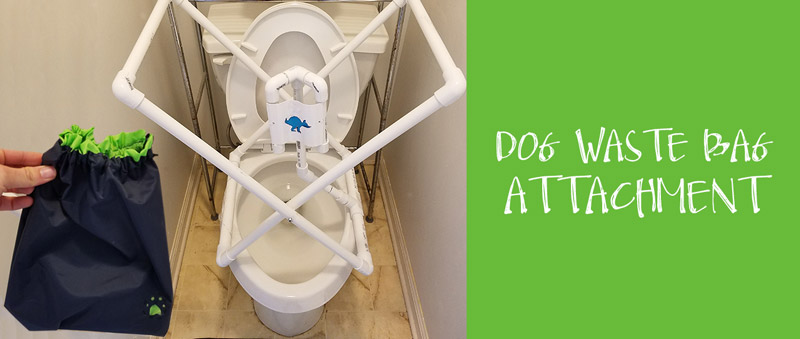
How to use your spray shield with the attachments.
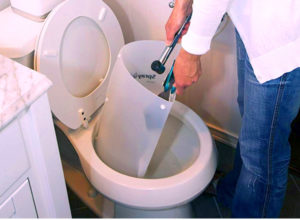
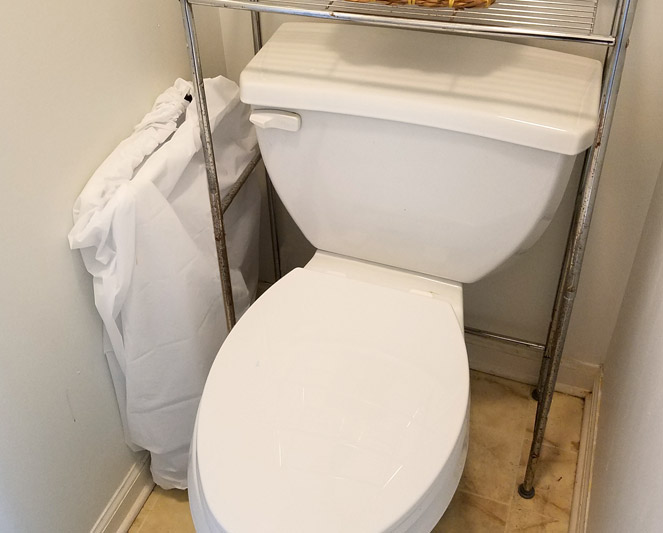
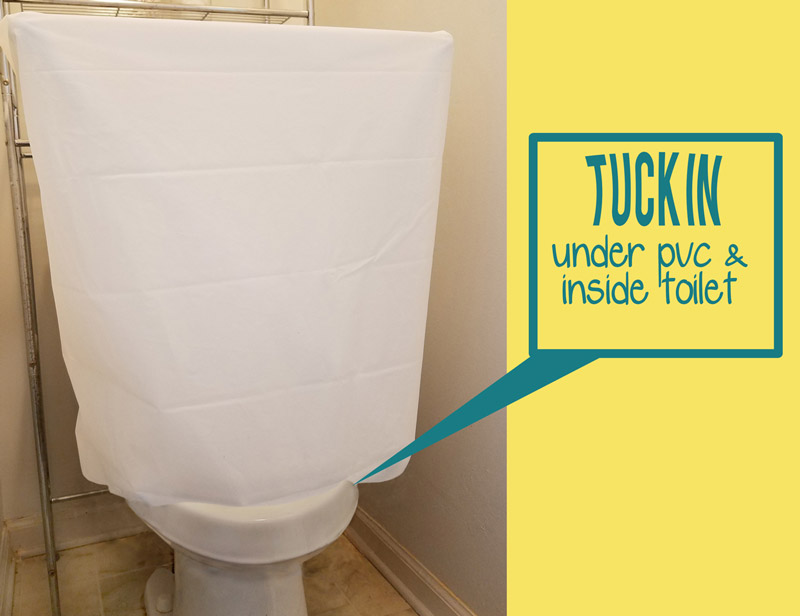
Lift both the toilet lid and seat up. Open the frame over the toilet and set it down on the rim. Adjust the cord stop if necessary. The excess curtain on the bottom should be tucked under the pvc and go into the toilet bowl.
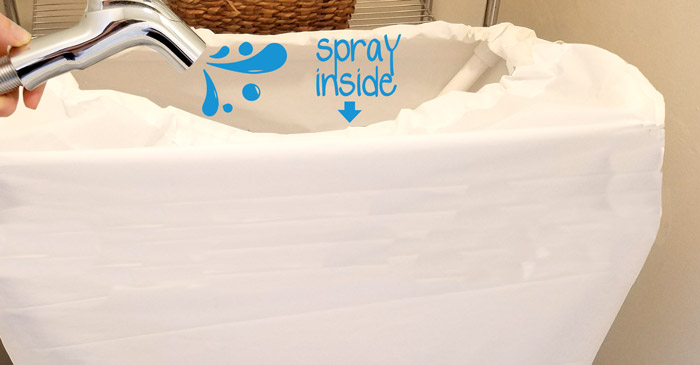
Spray down your items by using a handheld bidet attached to your toilet’s plumbing.
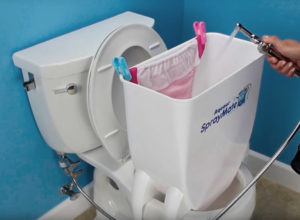
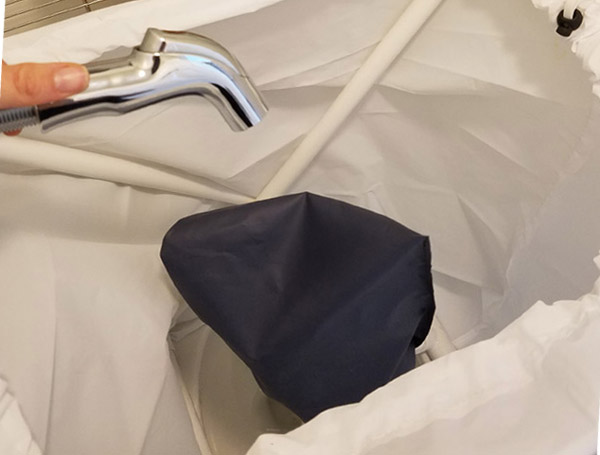
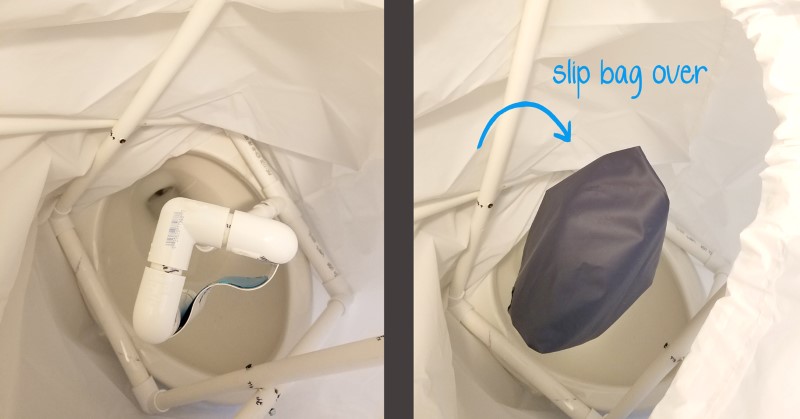
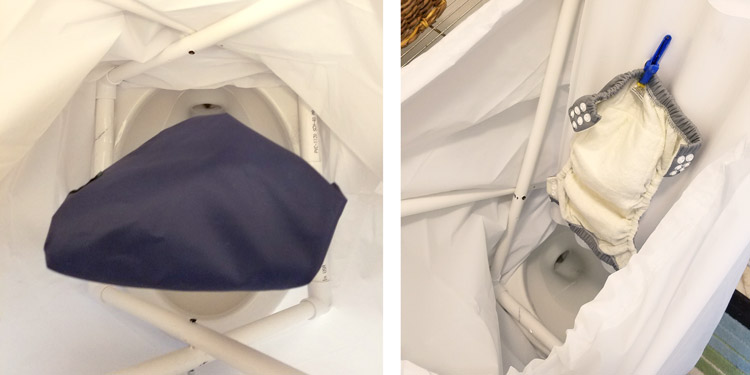
If you would like to wash your reusable dog waste bag (or another kind of bag), fit your dog bag attachment onto the center pole and keep it standing up straight. Turn the bag inside out and slip over the top. You can now spray it down from all sides.
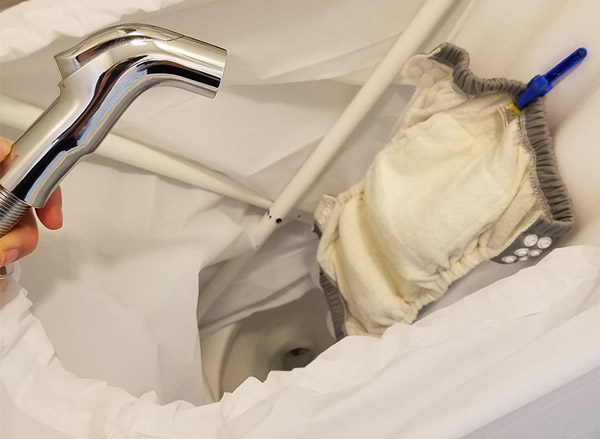
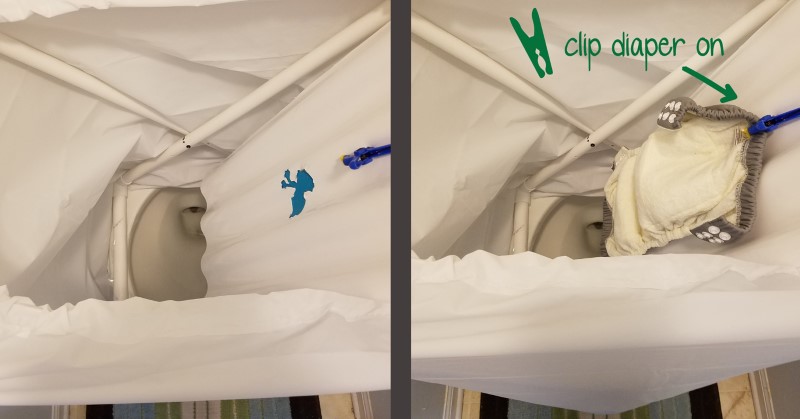
If you would like to wash a cloth diaper, place the diaper attachment onto the center pole and rotate it to the side. Clamp the diaper onto the panel and it’s ready to be sprayed down.
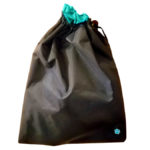
For cloth diapers, parents typically like to only rinse off the bulk then run the diaper through the laundry machine. The reusable dog waste bags that we sell are made of nylon and, although they can be washed in a machine, they can simply be sprayed down with bleach or an alternative disinfectant and then rinsed off. Hang to dry.
But wait? What if you want to wash your items over a bucket instead?
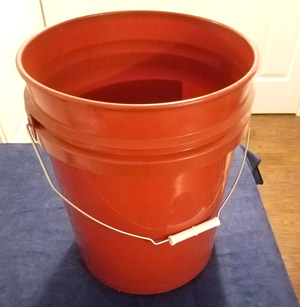
Whether you don’t have a toilet bidet or prefer to use a hose or shower head, you can make a small modification to your frame so it can sit on a bucket.
As is, the frame won’t stay balanced on a thin bucket rim, so you’re going to have to carve some pockets out of the bottom.
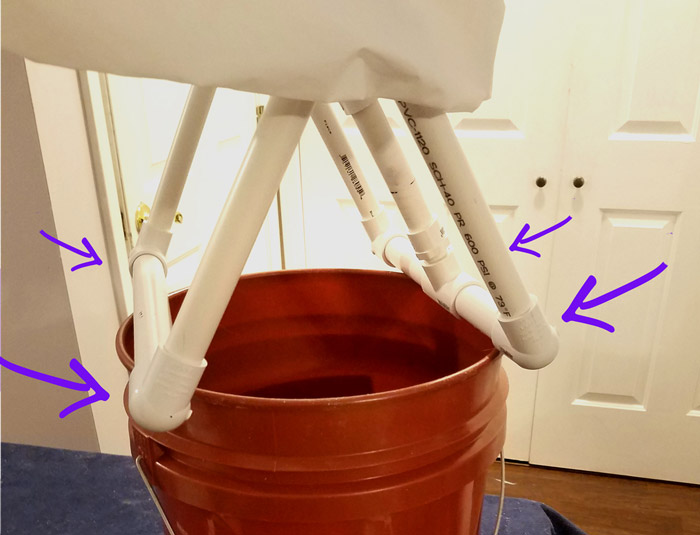
While steadying your frame on top of a five gallon bucket, mark with a sharpie underneath where the pvc touches the rim (as best as you can).

Preferably with a dremel, although a hacksaw can still work, cut out a gap around your lines that will be thick enough to fit over the rim’s edging. The ones I carved were about ½” x 1 ½” in size.

Now your frame can slip onto the bucket and rest more securely while you spray your items down.
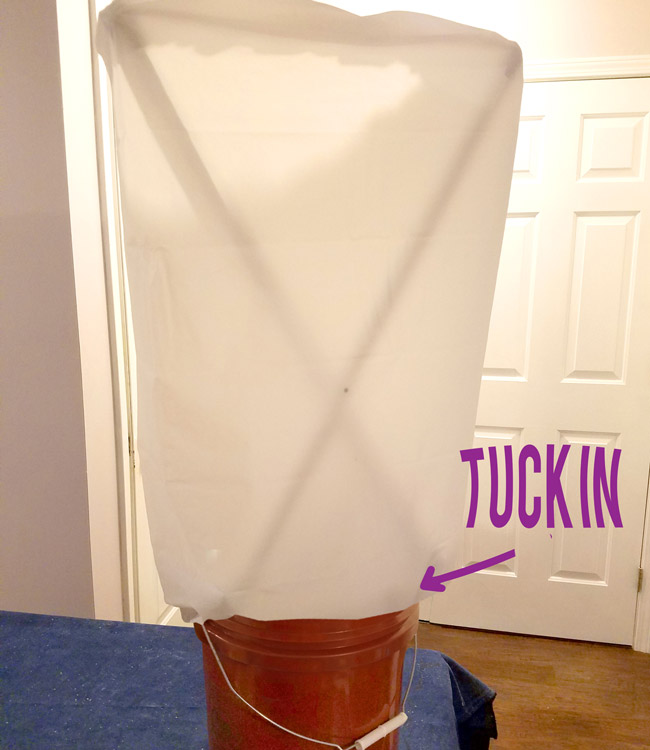
Make sure that when you place the frame on top, the curtain slips under the pvc and goes into the bucket to keep the dirty water in.
I LOVE how my frame turned out.
It’s so quick and easy to use with either attachment.
And I love the fact that it folds up after each use.

For those wondering what to do with the dog poop before you can wash the bags, there are a couple of options:
You can empty it into your outdoor trash can that holds your dog’s waste from the yard, you can flush it down the toilet (if your county allows it), or you can send it to a composting company that handles dog waste (if one exists in your area).
Check out the products used in in this tutorial:
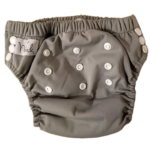
The washable diaper is sold by Wink Diapers, based out of Greensboro, NC. https://www.winkdiapers.com
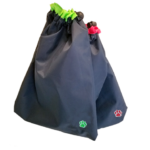
The reusable dog waste bags can be found at our online store, each handmade here in Asheville, NC.