You love working with fabric, making your own clothes and bags can be very rewarding and gets those creative juices flowing. And you know that each time you make something, you’ll most likely have some scraps of cut fabric left over. I’m sure that your creative brain has already found several ways to create something new with many of those scraps whether it be a colorful multi-block quilt or a patchwork throw pillow, but there comes a point where you keep cutting up your scrap fabric that all you are left with are tiny pieces that would take too much time and too much thread to sew together. So aside from throwing those scraps away, what can you do?
We faced the same problem when making our popular Reusable Dog Waste Bags. We make each bag here in Asheville, NC in order to replace one-time use plastic dog waste bags; But with our mission being to divert waste from the landfill, it didn’t feel right throwing out all those leftover scraps – and these are tiny pieces, some as small as 1” wide. Clueless, I stored them…and then stored some more… hoping one day an idea would come to me…. and it finally did!
Having recently viewed some latch hook rugs on Etsy (where else), I thought “That’s it!” I can make some type of hook rug, and since all the fabric we use for our pet waste bags are waterproof, it could be a durable pet proof rug that can be easily hosed off. The method I developed is somewhere between latch hooking (without the knotting) and needlepoint – all can be accomplished using common household items. No sewing tools needed!
First – Making the Canvas
This will represent the size and shape of your rug.
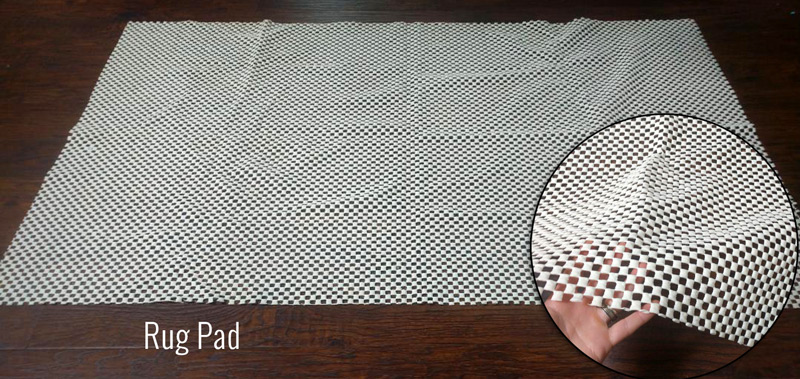
Typically for a latch hook rug, you’ll purchase a latch hook rug canvas, but to keep with the recycling theme, I ended up using some old rug pads that I found at my mom’s house. These rug pads actually work very well because the alternating square holes really help your fabric strips stay tightly in place. Simply cut the pad down to whatever size you want – of course the bigger it is, the more scrap fabric you’ll use up!
Since the square holes of my pad are about ¼” wide, I decided that a 1” width of fabric is a good thickness for a snug fit. If your pad has bigger holes, you’ll probably want to cut your fabric strips a bit wider.
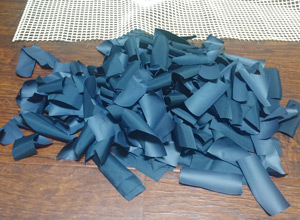 After pulling out bags and bags of my scraps, I began by cutting all the blue fabric into 1” x 3” strips. The blue is a tight weave, high denier nylon for my bags which is very soft and comfortable as a finished product. It rinses off easily and dries quickly. I just cut a small pile at a time – but trust me, you’re going to be cutting hundreds (if not thousands) by the end of this. If you want to estimate how many scraps you need, figure on 1.5 times the number of holes in your canvas as every hole will end up with 2 ends pushed through it.
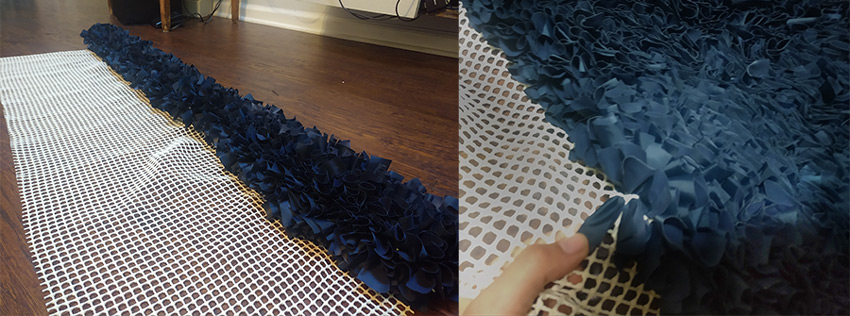
 To begin, start on the first row along one of the long edges of your canvas. Fold your fabric strip in half lengthwise to make it easier to fit through and simply push one end of your strip through a hole, go under the one grid line and come back up through the next hole (going lengthwise). The next fabric strip will go in through the hole your previous strip just came out of and repeat the process. Each square should have two pieces of fabric pushed through it EXCEPT the for the squares on the edge; Both ends of each fabric strip should be sticking up – the strips should feel nice and snug when gently pulled on and will NOT need any tying.
Continue with your strips, row by row in the same direction to the opposite edge. At first, you will see the white of the rug pad in between each fabric strip, but this will eventually disappear as you fill in your canvas and it becomes more compact. The reason why you don’t need to add the second piece of fabric to the squares on the edge is that the high density of the fabric will cause the edges to curl over a bit, hiding any sign of the pad.
It takes some time, but boy is it satisfying when it’s done…
Next – Adding a Design
Since we’re a pet removal company, I had to of course put a pet related pattern on my rug. I have developed two techniques to do this and your choice will depend on what type of fabric scraps you have – both will give a similar look in the end.
First Technique: Using a Stencil
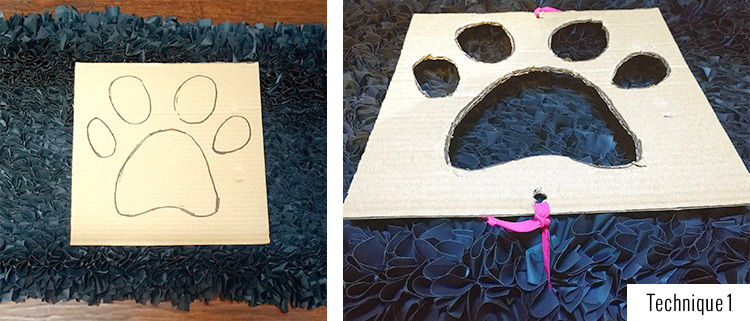
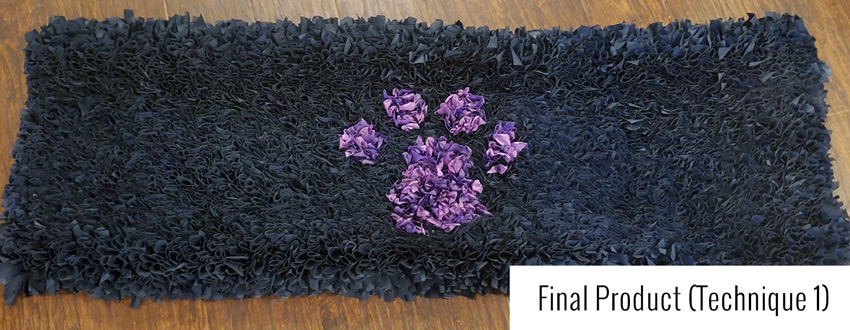
The first technique is if you have a variety of thicknesses in fabric. For example, for my first rug, I wanted to place a pink and purple paw print in the middle, but all my pink/purple fabric is really thin and sheer, therefore the center of my rug would come out a lot thinner and flatter. So instead, I first did my entire rug in the thicker blue fabric and then used a stencil.
I made the stencil by drawing a paw print on a piece of cardboard and then cutting it out. I also placed a small hole above and below the design. I tied an elastic band in one hole, wrapped it under the mat and then tied the other end in the other hole in order to hold the stencil in place.
I cut my pink/purple fabric into 1” x 4” strips. The longer strips give it a cool raised look without really varying the height of the mat. Filling in the stencil, I used the same technique as before of pushing through the holes and pulling up. For this, I definitely needed a tool for this as it’s a lot more tight trying to put a second layer of fabric into each hole.
Here’s how it turned out:
Second Technique: Draw Directly on Pad
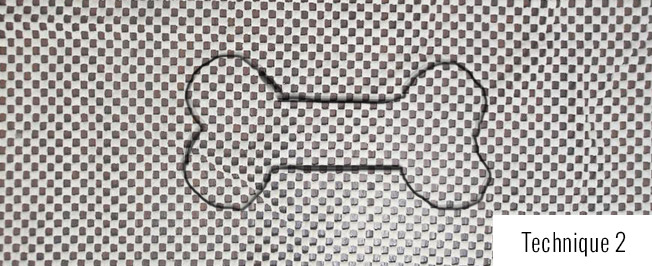
The second technique is if all of your fabric scraps are relatively the same thickness. If so, you can simply draw your design directly onto the canvas using a sharpie.
In this example, I drew a dog bone design and then went around it with my blue fabric.

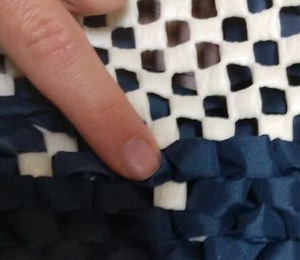 Tip: If you’re afraid you may have missed one or two holes as you go up and down, don’t worry! Simply flip over the mat and you’ll be able to see if there are empty squares that are missing fabric.
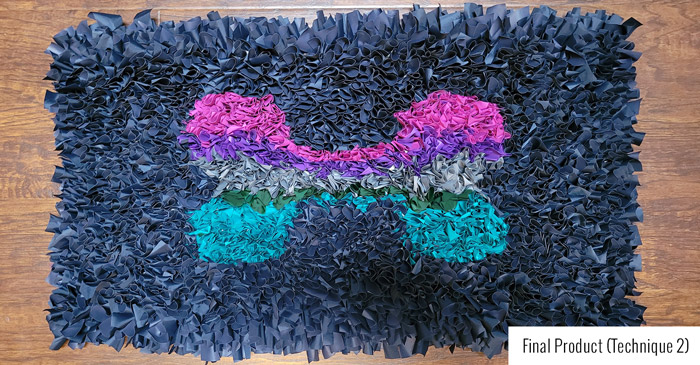
After that, I filled in the dog bone with a few different colored fabrics (the colored fabric can either be cut to the same 3” length or you can make them 4” longer if you want the slightly raised look).
Here’s the final result:
This is a simple yet rewarding craft. It can be done while watching tv, listening to music or whenever you have free time. Keep that creativity going! Vary the fabrics, make a faux “shag” rug or wall art. Turn those scraps which would otherwise end up in landfill into a decorative and useful creation.
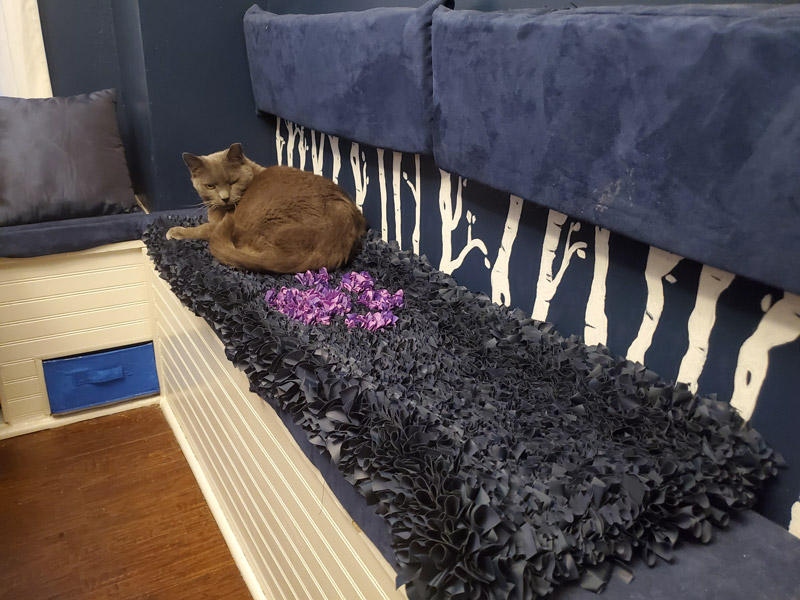
…Do you approve, Coraline?

