Step-by-step instructions for an elegant solution to conceal both the sight and smell of your cat’s bathroom.
Supplies:
- Computer Desk
- Plast-O-Mat Ribbed Shelf Liner
- Black sharpie
- Four mortise door hinges (3” – 4” in size)
- Small Bag of Poly-fil (polyester filling/fiberfill)
- Several pieces of plywood (untreated pine or birchwood) from hardware store (follow instructions below to get dimensions)
- Interior Paint + Primer in one
- Several paintbrushes ranging from small to large
- AquaZar (Water-based interior sealer)
- Litter box
- Two cabinet knobs
- Two magnetic cabinet catch & plates
Tools:
- Electric Drill
- Mini glue gun
- Electric Jigsaw (recommend a reverse blade)
- Screwdriver
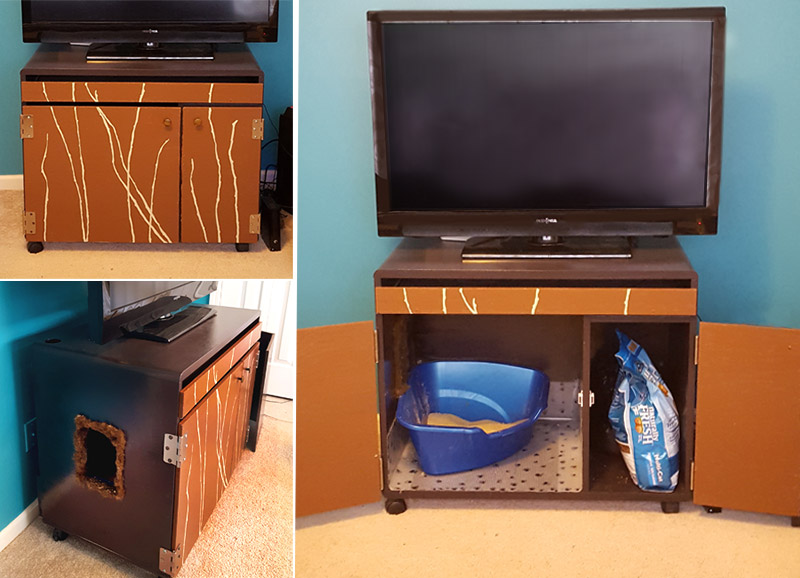
Why a computer desk?
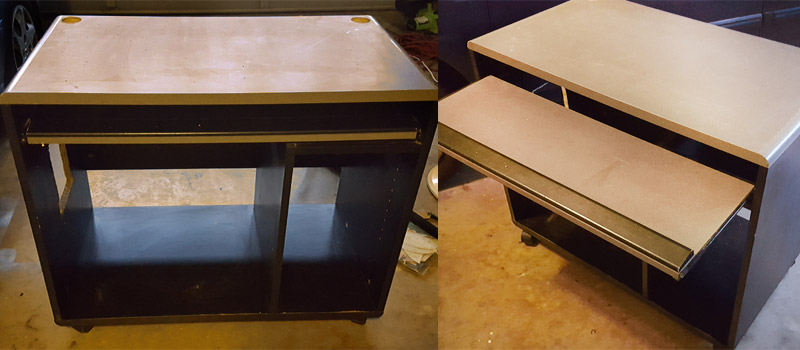
And not a dresser, cabinet, or trunk? It seems like almost any type of furniture could be made into a cat litter enclosure with enough creativity, but I chose the computer desk for its off center divider making one alcove much larger than the other, providing a perfect space to fit a litter box.
When shopping around for the right computer desk, make sure the larger alcove would be able to fit the litter box you have while giving enough headroom for your kitty to comfortably squat down. My alcove is 22”W x 21”H x 20”D and the litter box I used is 20”W x 9”H x 17”D.
Cutting the hole for the cat entrance
How big should your cat entrance be? Cats have an amazing ability to fit through much smaller spaces than we realize. If you think about it, cats have no collar bone, so has long as their small head and shoulders can fit through the opening, the rest of their body will follow. Typically, an adequate sized opening for cats up to 15 pounds is 5 ½” x 7 ½” (up to 8 ½” x 12 for larger cats). It’s important not to cut the opening too large as it will let more odor escape and more litter to spill out.
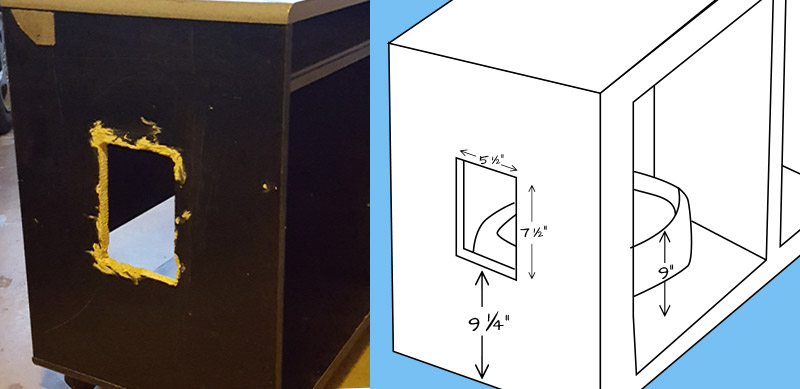
The placement of the opening is also very important – too high and your cat can’t reach it, too low and the litter box will block the entrance. Best location for the cat entrance is to have the bottom of the hole start ¼” higher than the height of the litter box. So for instance, my litter box is 9” tall, the bottom cut (5 ½” wide) of the opening should be 9 ¼” high, the top cut (5 ½” wide) should be at least 16 ¾” from the base. Get the width of the desk’s side to determine the center point and draw out your opening using a T-square.

Carefully cut the lines you drew with an electric jigsaw. I recommend a reverse blade to minimize chip-outs and produce smoother cuts.
Measuring out your wood pieces
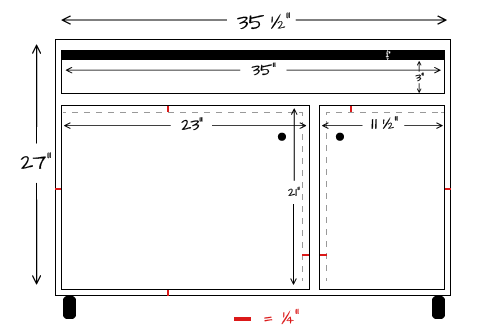
The Doors
You’ll need to get two pieces of wood cut (one wider than the other with the same height) in order to serve as doors for each of the alcoves. Not all computer desks are built the same size, but the way to measure the wood for the doors remains the same. Simply maintain a ¼” border around the edges, and ensure there is a small space between where the doors meet at the desk’s divider.
To get the dimensions:
- Measure the height of the right alcove, including the top and bottom wooden frame, then, subtract ½”. This will be the height for both of your doors.
- Measure the width of the left alcove including the left wooden frame. This will be the width of the left door.
- Measure the width of the right alcove including the right wooden frame. This will be the width of the right door.

The Drawer
If your desk has a drawer like mine, you’ll want a to cut a front and back for it (the back piece will prevent things from falling backwards into the litter).
To get the dimensions:
- Measure the width of the desk, subtract ½”. This will the width of the front piece.
- Measure from the bottom of the drawer to the start of the top wooden frame, subtract 1”. This will be the height of the front piece (The gap will allow your fingers to reach in to open and close the drawer).
- Measure the width of the drawer. This is the width for the back piece.
- The height of the back piece should be 1-2” tall.
If your drawer does not have a thick enough height to it, you may want to hot glue the wood to the drawer rather than drill screws into it.
The Back
If your desk has very little backing or no backing at all, you may want cut extra wood to cover it in order to further contain the odor. Notice how I still leave several gaps open – although we do want to contain the odor, we do not want to seal it completely off from oxygen, as it will make the smell far worse when having to go in to scoop the litter.
Cut several pieces to the full width of the back of the desk, covering as much as the back as you want (I used several pieces of scrap wood I found in my garage). Screw the pieces to the back wood frame.
You could get the wood cut at the same hardware store where you buy it, but keep in mind their equipment is not always accurate. The store’s blades have large teeth to handle thick pieces of wood and may not be able to be that precise down to the quarter inch. You might have better luck cutting it yourself with the jigsaw or take it to a professional woodworker.
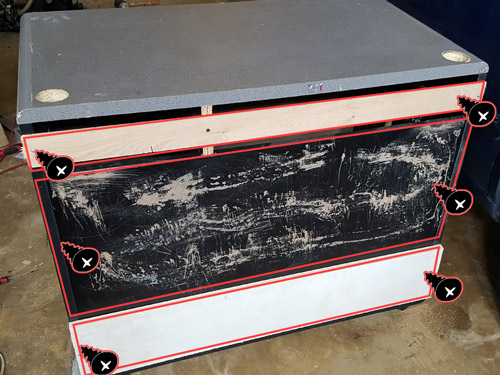
Attach Door Hinges
 When aligning the doors to the desk, shift the left door ¼” to the right, and the right door ¼” to the left, making sure there is space in the middle so the doors won’t touch when they’re closed.
I used two 3” hinges on each door to connect to the sides of the desk. Make sure that each hinge will fit into the ¼” recess created between the door to the desk’s edge, allowing the flaps to lay flat.
I screwed the hinges on the outside in order to give the enclosure a unique look, but the traditional method is to have the hinges on the inside, hidden from view.
Attach Door Magnets & Knobs
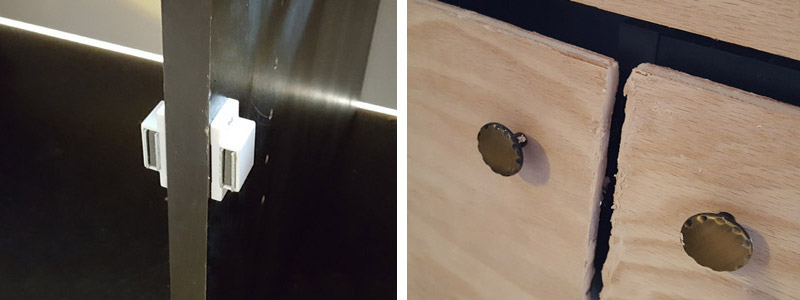 Determine the vertical center of the desk’s divider and screw in a door magnetic catch to each side. At the same height, screw in a strike plate to the inside of each door to match up with the magnets.
Finish off the doors with screwing knobs into the top corners. Open and close the door a few times to make sure everything has been lined up properly and the door properly sticks shut.
Design & Paint
Prior to painting, remove the doors and hinges and sand down the entire surface of the desk in order to ensure a nice even finish without any crackling. An orbital sander would be ideal, but honestly if it doesn’t seem that bad, some sandpaper and steel wool might do the trick. Make sure to vacuum up any sawdust that gets left behind.
This is where your artistic eye comes in. Pick your colors and buy an eggshell or satin interior latex paint that already has a built in primer (I like the brand Valspar). Two coats should be enough. Once dry, paint whatever other designs you want in either a latex or acrylic paint.

In order to seal the paint to protect it from scratches or water stains, apply at least one coat of AquaZar (an interior water-based polyurethane finish). Allow the desk to fully dry overnight.
Add Fluff
Using your glue gun, take a few handfuls of fluff and glue them down onto the inner frame of the cat entrance. This will give your kitty a gentle brush instead of having to rub up against any wood when going in and out of the enclosure.
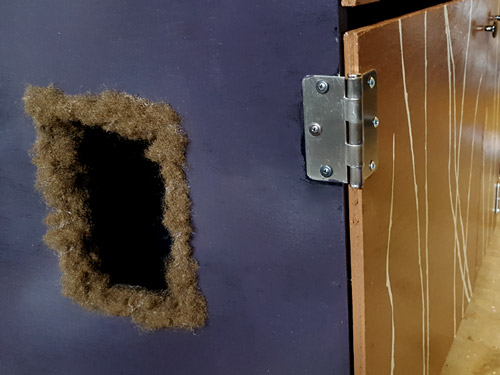
Poly-fil typically comes in a white color that you can easily order online. I ended up using brown (which I couldn’t find anywhere online) that I ended up pulling some out of one of my dog beds.
Lay Down Inner Liner
Although you have placed sealer on the desk, you’ll still want additional protection in case your kitty ever misses the litter box.
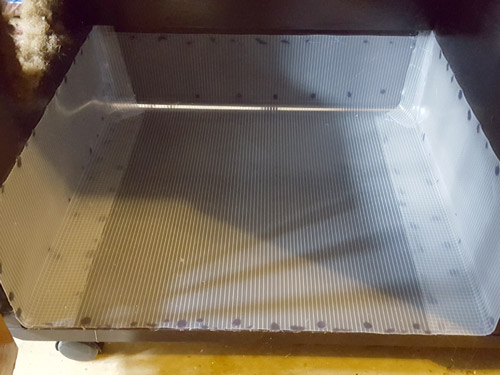
You’ll want to cover the entire bottom of the alcove with the Plast-o-mat and at least 6” high around it. I purchased a 2’ x 10’ roll and cut it up into 3 pieces, overlapping each other to create a leak-proof seal. Secure the liner in place by hot gluing it down, making a glue dot every 2-3”.
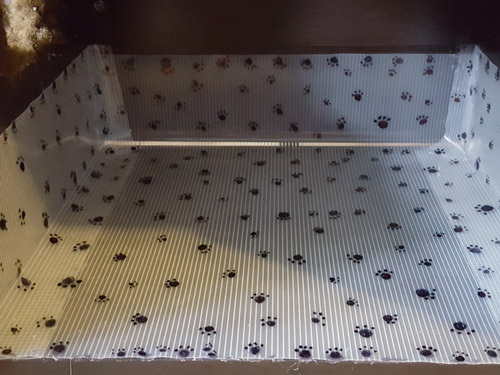
You may notice that the dried glue can be seen right through the mat – but not to worry as I’ve come up with a simple solution to conceal it. Using a black sharpie, draw a small paw print over each glued spot, then a few more paw prints scattered around. At a distance the paw prints will look printed on the mat.
You’re done!

Place your litter box on one side and any extra litter and cleaning supplies on the other. Keep the door to the enclosure open for the first 2-3 days until your kitty gets used to it. You can keep a small jar of baking soda in the top drawer to help counteract any odor. I also have a mini vacuum plugged in nearby for any litter that might spill out.
I’m amazed at how I can sit right near the desk to watch tv and not smell a thing!
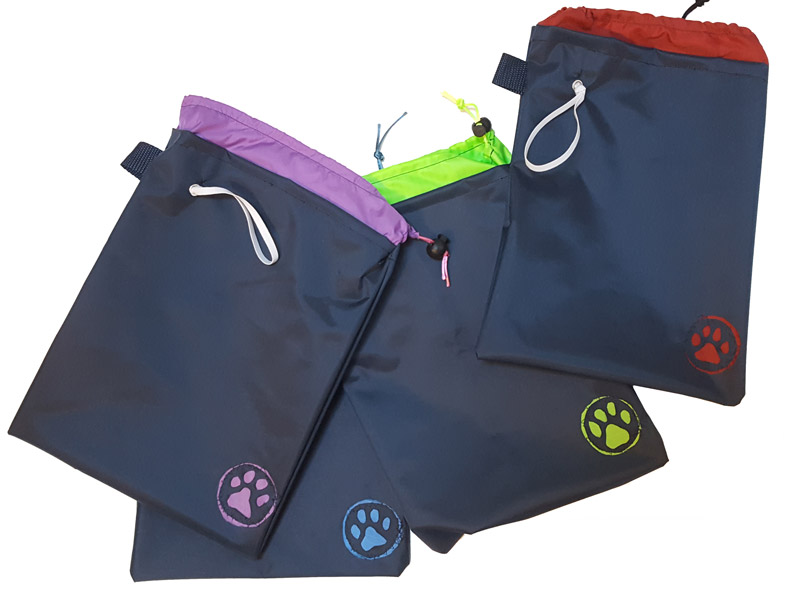 DIY Washable & Reusable Dog Waste Bags